![]()
The Computerised Flight Report and Logbook Program
Preparing for the Initial Installation of Pocket RosterLog v2
The following describes how to set up your PC and PDA for the initial installation of Pocket RosterLog v2 for PDAs. Before installing the PDA version of the program, the PC version, RosterLog, must be installed and running bug-free on the PC.
We suggest you print this guide to make your life easier. It's not as scary as it looks. Promise.
Background
to the File Structure
The PC and PDA programs are basically 'reader' programs, taking information
from the folders in the RosterLog folder, displaying it, changing it, then
saving it again back into the RosterLog folder. The plan for running the two
programs (PC and PDA) together is to have each program on its own machine,
and the RosterLog folder available to both. So if you change a day on the
PDA, the PDA's version of the day will differ from the PC's version until
you Sync the PDA with the PC when the PC files will be brought up to date
with the PDA's. If you follow.
The
Plan
So to run the two programs, we need to move (not copy) the RosterLog folders
to your Shared Documents folder, i.e. the folder where the PDA and PC synchronise.
Step
1. Do you have a Shared Documents folder?
That's the folder that is shared by the PC and PDA, and anything inside is
copied to both machines. If you've never come across a folder called 'Pocket_PC
My Documents' or something similar, it's possible that your installation of
ActiveSync is not set up to transfer files to and from your PDA.
If you have a shared documents folder then skip this step. If not or you're unsure, launch ActiveSync and go Tools, Options,

and select Files (make sure there's a tick in the box!) and then click Settings...,
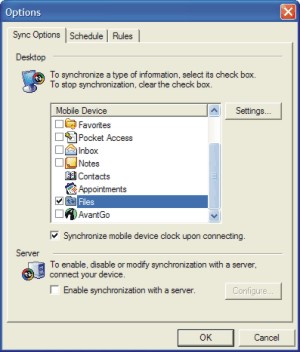
it will give you the location of your shared folder.

If it's
too long to read in the window (as above), click the cursor on it, then scroll
right using the arrow keys. You can enter a different folder if you wish,
just type it in. Write down this path.
Step
2. Moving your RosterLog Folder to the Shared Folder.
We need to move (not copy) the entire RosterLog folder into the shared documents
folder. Windows Explorer (My Documents) is the best method.
Open My Documents and find your RosterLog folder (the one that contains Airports, Aircraft etc.) and right-click on it.

If your Shared File is called Pocket_PC My Documents or something similar,
it will also appear on the Send To menu. So right click over the RosterLog
folder, choose Send To, and then the Shared Folder, and Bob's your Uncle.
That has copied the folder over, but to prevent duplication, I suggest that
you delete the original RosterLog folder otherwise we'll be up to our eyes
in them soon, not knowing which one has the most recent info! Check the transfer
has taken place by looking in the shared documents folder for a folder called
RosterLog, then return to your original RosterLog folder and delete it.
If you're successful, then you should have all the files and folders in the
shared documents folder. But the PDA can't read the PC's RosterLog program,
and there's little point having 1.7mb of useless program taking up space on
your PDA. So we need to move the program (and one other file) out of the RosterLog
folder in the shared documents folder, and place it somewhere else. I suggest
directly into My Documents.
So, in 'My Documents' open the new RosterLog folder in your Shared Documents
folder, and there will be:
We
need to move (not copy) the Interop.Outlook.dll file and the RosterLog 28Jan07
(or whatever date)to the My Documents folder. Right click over each in turn,
Send To, My Documents, then delete the ones in the RosterLog folder in the
shared documents folder.
So now we should have a file structure that looks like:
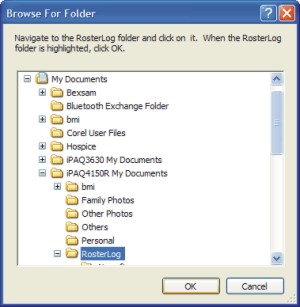
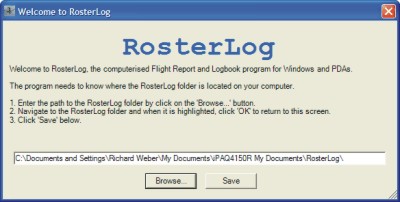
When you next run RosterLog for the PC, it will ask where the RosterLog folder
is (as it's no longer in it!)
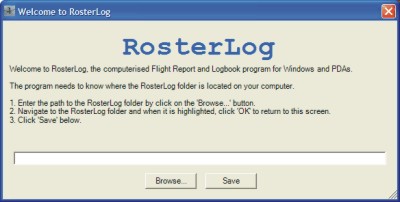
Click Browse... and navigate to the path to the shared documents folder (you wrote it down in Step 1.) When you find it, select it so it turns blue (or whatever wierd colour you have) then click OK, and on the next screen, Save.
Step 3. Updates
When you come to update the program, please remember that the PC version (RosterLog) is now in the My Documents folder, and that is where you should Browse... to to install future RosterLog Updates.
Step 4. Make a Cup of Tea
You've
deserved it!
So far so good. (Or not!) The RosterLog folder is now available to both the
PDA and the PC.
Step 5. Continue with the Pocket RosterLog v2 Installation.
![]()